10 Tips to Save Moolah on Interior Painting
1. Material Estimating:
a lot of homeowners end up purchasing more paint then is required, especially for interiors one gallon does 320sqft (two coats) an average room has 304sqft of wall (9.5’x 9.5’x 8’) so that should leave a little extra for touch-up. One gallon should do two normal size baths (6’x 9’x 8’) since the shower and vanity take up a lot of square footage.
2. Micro-Fiber Sleeves:
at retail prices roller sleeves (the fluffy part) of any variety cost a fortune if you are using a different one every day. Micro-fiber sleeves not only hold more paint, they clean out easier and many more times than others. We’ve used magenta paint one day and white the next with no colour bleed!
3. Use Cheapo Brushes (not the dollar store ones):
I know it seems counter intuitive to use a re-usable sleeve and a throw away brush, but there is method to our madness. Cheapo brushes (2.5 – 3” sash brushes like the easy glide ones you can get at dulux) are often the firmness you want when you first start using them and slowly loose their firmness the more you clean them. The more expensive often aren’t firm enough for use the first 2-3 times you use them. If you are completing a small project the Cheapo should be sufficient
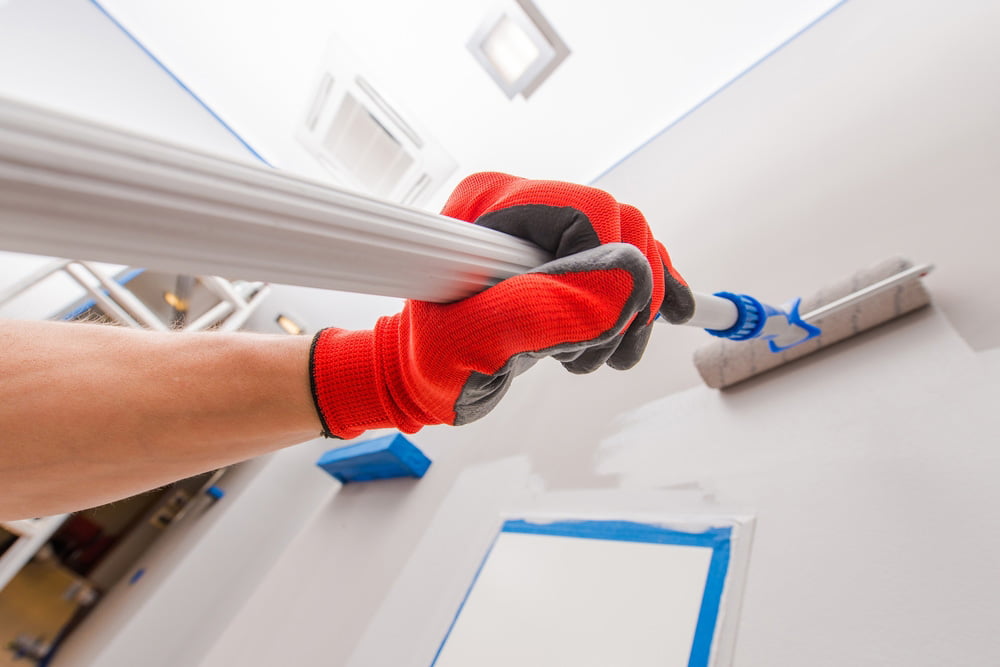
4. Rolling Properly:
I’ve been witness to a lot of DIYers painting. The most time costly mistake (meaning requires more coats) most people make is in rolling. Rolling should be almost effortless; if it isn’t you are doing it wrong. Roll with medium to light pressure until the coverage starts to become uneven then roll back through the wet and then back into the dry, we are aiming for uniform coverage. Oh and please, please, please use a roller poll. We do not want any herniated discs. For a video go to http://www.youtube.com/watch?v=jnZlhBUhA30&feature=youtube_gdata_player Warning: certain products i.e., Pratt & Lambert Accolades, Benjamin Moore Aura, and C2 interior paints should not be back-rolled
5. Patching:
When filling or patching a hole keep in mind that the filler will likely shrink as it dries. In most cases you will need to fill multiple times. Some fillers do not sand well so it is critical to wipe all excess product of with your putty knife.
6. Cross-Pour Gallons:
If you have multiple gallons of the same color mix them all together in a larger container, this way if you run out of a gallon half way through a wall you can just use one of the others and not worry about the colour being slightly different. As it often varies from gallon to gallon.
7. Use Tape Sparingly:
that Frog stuff seems to be all the rage with DIYers but the truth is… it’s fantastically expensive. It retails for something like $12 a roll if you are taping the door frames, the window frames, the ceiling it is really going to add up. Instead tape the base boards only to shield from overspray and learn to “cut-in” the rest. For a video on how-to go tohttps://www.youtube.com/watch?v=GPuhH8KHwQw&feature=youtube_gdata_player
8. Stopping Paint Bleed:
The first time you “cut-in” trim that is taped you must do this with a dry brush (wipe all excess paint off of the brush) this will seal the edge of the tape for the next coat where you can use the normal amount of product. This will prevent the paint from bleeding through and give you a nice clean tape line. This also allows you to purchase less expensive tape.
9. Spot Priming:
while previously painted surface (unless painted with oil) do not require primer/sealer (There is another post coming on priming), patches do require spot priming. Do this with a relatively dry brush and dab to replicate the orange peel of a roller.
10. Hire a Pro:
depending how much your own time and effort is worth plus materials and equipment it may be more cost effective and a better result to hire a contractor. We happen to know a good one.